A professional-looking manicure doesn’t have to come with a salon price tag. With a little patience, practice, and the right tools, you can achieve a salon-quality manicure right from the comfort of your own home. Whether you’re looking to save money or simply enjoy a relaxing at-home beauty session, here are some essential DIY manicure tips to help you create flawless nails every time.
- Gather Your Tools
Before you get started, make sure you have all the tools you need for a successful manicure. Having the right tools can make the process much smoother and help you achieve professional-looking results. Here’s a basic list of what you’ll need:
- Nail polish remover (preferably acetone-free)
- Nail clippers
- Nail file and buffer
- Cuticle pusher or orangewood stick
- Cotton pads or balls
- Base coat, colour polish, and top coat
- Nail oil or hand cream
Having everything ready and within reach will help you work efficiently and avoid interruptions during the process.
- Start with Clean Nails
The first step in any good manicure is ensuring your nails are clean and free of any old polish. Use a cotton pad and some nail polish remover to take off any leftover polish. Even if you don’t have any nail polish on, it’s still a good idea to wipe your nails to remove any oils or dirt. This ensures that your new polish will adhere better and last longer.
- Trim and Shape Your Nails
Next, trim your nails to your desired length using a nail clipper. If your nails are already the right length, simply shape them with a nail file. Avoid filing back and forth, as this can weaken the nails. Instead, file in one direction to prevent splitting. You can choose from various nail shapes—square, round, oval, or almond—depending on your preference and what flatters your fingers best.
After filing, buff the surface of your nails lightly to remove any ridges and to create a smooth canvas for your polish. This step isn’t necessary for everyone, but it can give your nails a more polished and professional appearance.
- Soak and Care for Your Cuticles
Soaking your nails in warm water for a few minutes can help soften your cuticles, making them easier to push back. You can add a few drops of essential oil or a special cuticle softener to the water to nourish the skin around your nails. Once your cuticles are softened, use a cuticle pusher or orangewood stick to gently push them back, avoiding any harsh or painful movements.
If you have any hangnails or excess cuticle skin, use a cuticle nipper or a pair of sharp scissors to carefully trim them. Be sure not to overdo it, as cuticles play an important role in protecting your nails from infections.
- Apply a Base Coat
Applying a base coat is a crucial step in ensuring that your manicure lasts longer and doesn’t stain your nails. A base coat helps the polish adhere better to the nail and provides a protective layer. It also helps smooth out any imperfections on the nail surface. Apply a thin, even layer of base coat to each nail and let it dry completely before moving on to the colour.
- Apply Nail Polish Like a Pro
When it comes to applying your colour polish, thin layers are key. Begin by applying a small amount of polish to the brush, and then gently sweep it across your nail from the base to the tip. Start in the centre of your nail and work your way out towards the sides, ensuring that the colour is even and there are no streaks.
For the best results, apply two thin coats of colour polish, allowing each layer to dry completely before applying the next. This helps prevent smudging and ensures a more durable finish. Make sure to seal the edges of your nails by running the brush along the tips to prevent chipping.
- Finish with a Top Coat
Once your colour polish is dry, apply a top coat to seal in the colour and give your nails a glossy, shiny finish. A top coat adds an extra layer of protection and helps extend the life of your manicure by reducing chips and scratches. Apply a thin layer of top coat over your entire nail and let it dry completely.
If you want to extend your manicure even further, consider applying a fresh layer of top coat every two to three days to maintain the shine and prevent any dulling.
- Take Care of Your Nails After Your Manicure
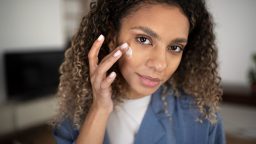
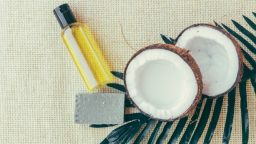
Once your manicure is complete, don’t forget to moisturise your nails and cuticles to keep them healthy and hydrated. Use a nourishing cuticle oil to keep the skin around your nails soft and smooth. You can also apply a hand cream to keep your hands hydrated, especially after all the work you’ve put into your nails.
- Be Mindful of Drying Time
Patience is key when doing your own manicure. After you’ve finished applying your final top coat, allow your nails to dry completely before touching anything or using your hands too much. This can take anywhere from 30 minutes to an hour, depending on the type of polish you’re using. If you’re in a hurry, you can speed up the drying process by dipping your nails in cold water for a few minutes or using a quick-dry spray.
- Maintain Your Manicure
To keep your nails looking fresh after your DIY manicure, try to avoid exposing them to harsh chemicals or rough surfaces. Wear gloves when doing dishes or cleaning, and be careful not to use your nails as tools. If you notice any chips or cracks, touch them up as soon as possible to prevent them from getting worse.
Conclusion
With a little practice and the right tools, doing your own manicure at home can be just as satisfying as visiting a salon. Start with clean nails, apply a base coat, and take your time with the colour and top coat. Moisturising your nails and cuticles regularly will keep them looking healthy and hydrated, while patience in the drying process will prevent smudges and smears. By following these DIY manicure tips, you can enjoy beautiful, salon-worthy nails without leaving your home.